Looking for nail designs that don’t require a steady hand or hours of your time? I’ve spent years perfecting quick nail techniques that pack a visual punch. Whether you’re rushing to a date or just want to freshen up your look without the hassle, these effortless nail designs will have everyone thinking you splurged at a fancy salon.
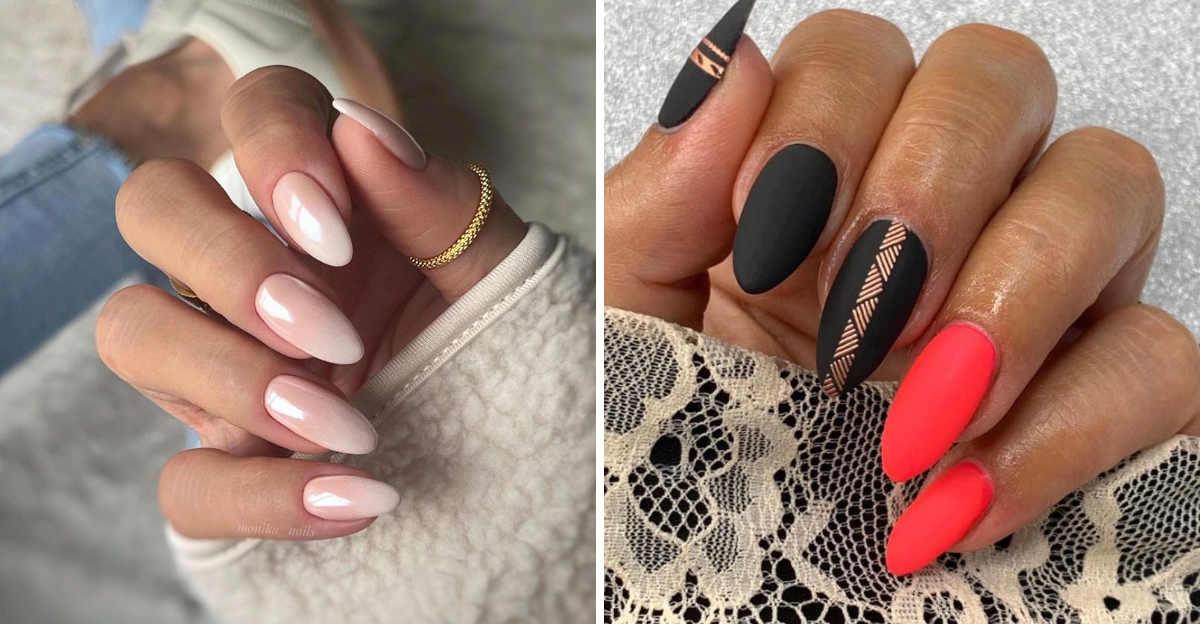
1. Gradient Ombré Tips
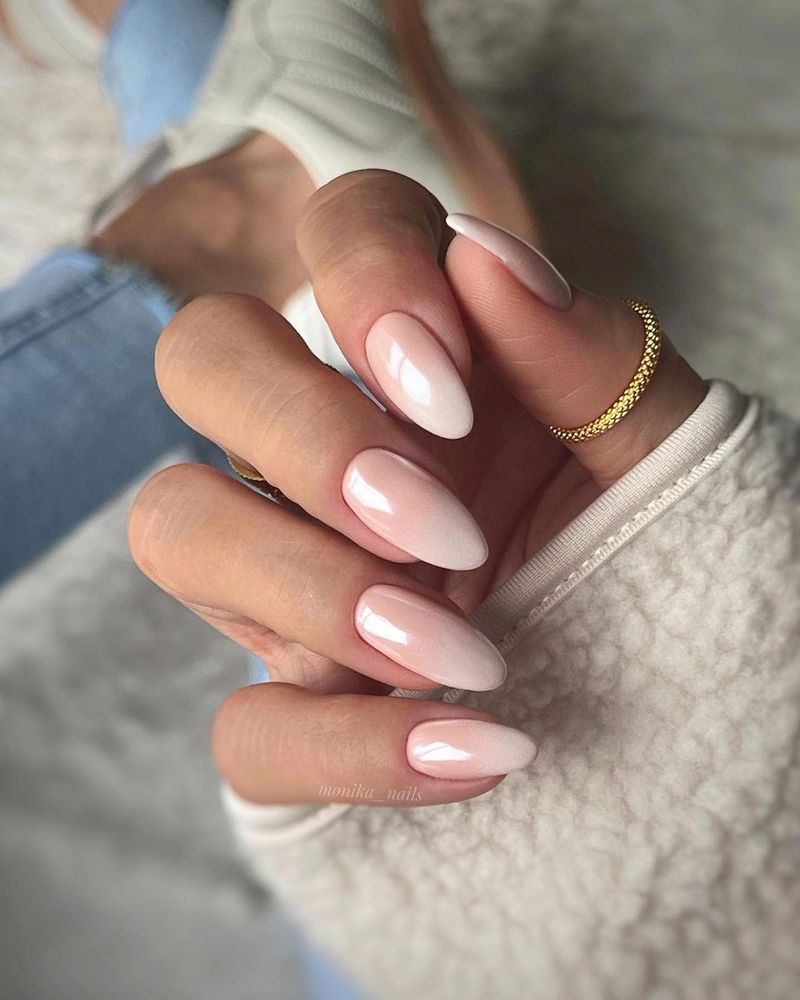
Honestly, ombré tips are my go-to when clients want something chic but are pressed for time. Simply dab a makeup sponge with two complementary polish colors, then press gently onto your nails from tip to middle.
The color fade creates dimension without requiring precision. My clients always gasp when they see how elegant their hands look with minimal effort!
2. Negative Space Half-Moons
Where traditional manicures fail, negative space designs triumph! Leave the base of your nail bare while painting the rest with your favorite shade. Though seemingly complex, this technique forgives wobbly hands.
Paper hole reinforcers make perfect guides if you’re nervous about freehand curves. I’ve converted countless precision-phobic friends with this trick!
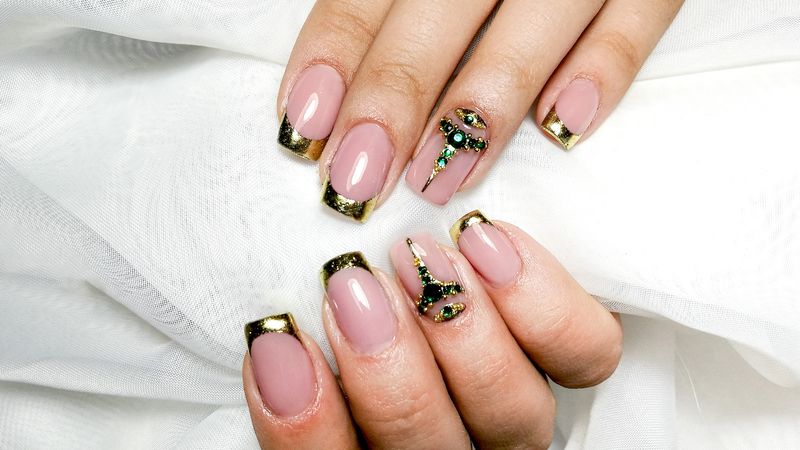
3. Metallic French Tips
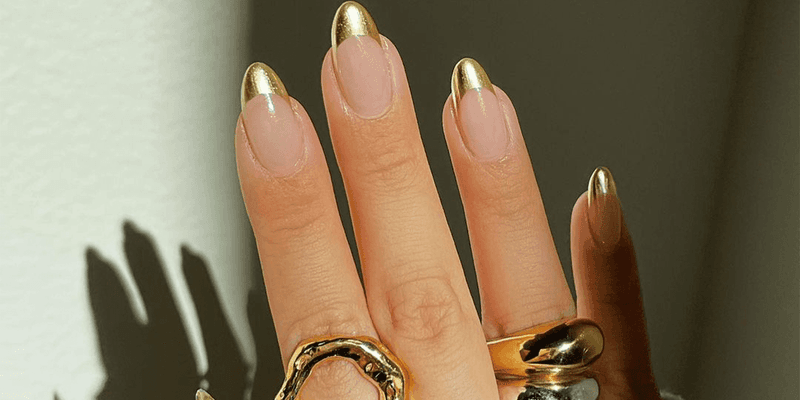
Whoever said French manicures were outdated clearly hasn’t tried my metallic twist! Instead of traditional white, swipe gold or silver polish across your tips for instant glamour. The shimmery finish catches light beautifully.
However imperfect your line, the metallic sheen distracts the eye. My celebrity clients request this before red carpet events—it’s that foolproof!
4. Dotted Minimalism
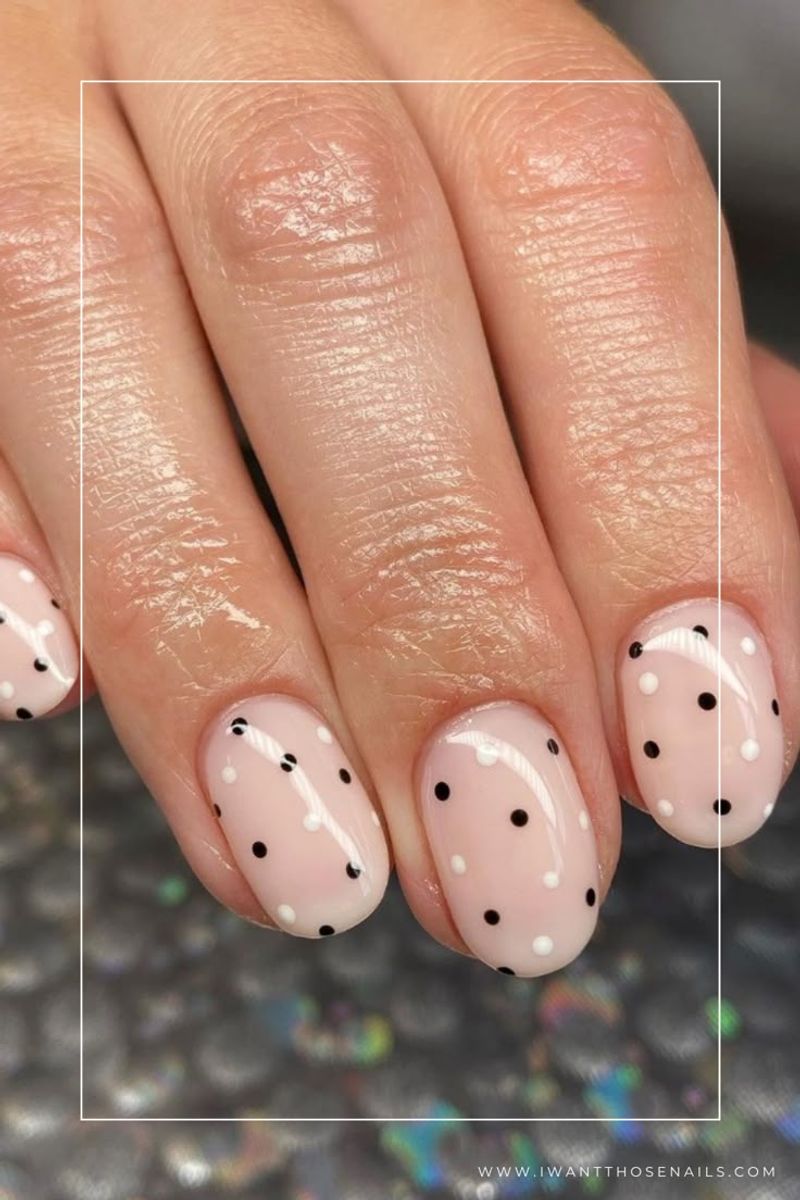
If you’ve ever struggled with nail art, grab a bobby pin—your new secret weapon! Dip the rounded end into polish and press onto your nail to create perfect dots. Arrange them in lines, triangles, or random patterns.
Though ridiculously simple, these tiny accents transform plain manicures into conversation pieces. My clients love how these dots elevate their office-appropriate nails!
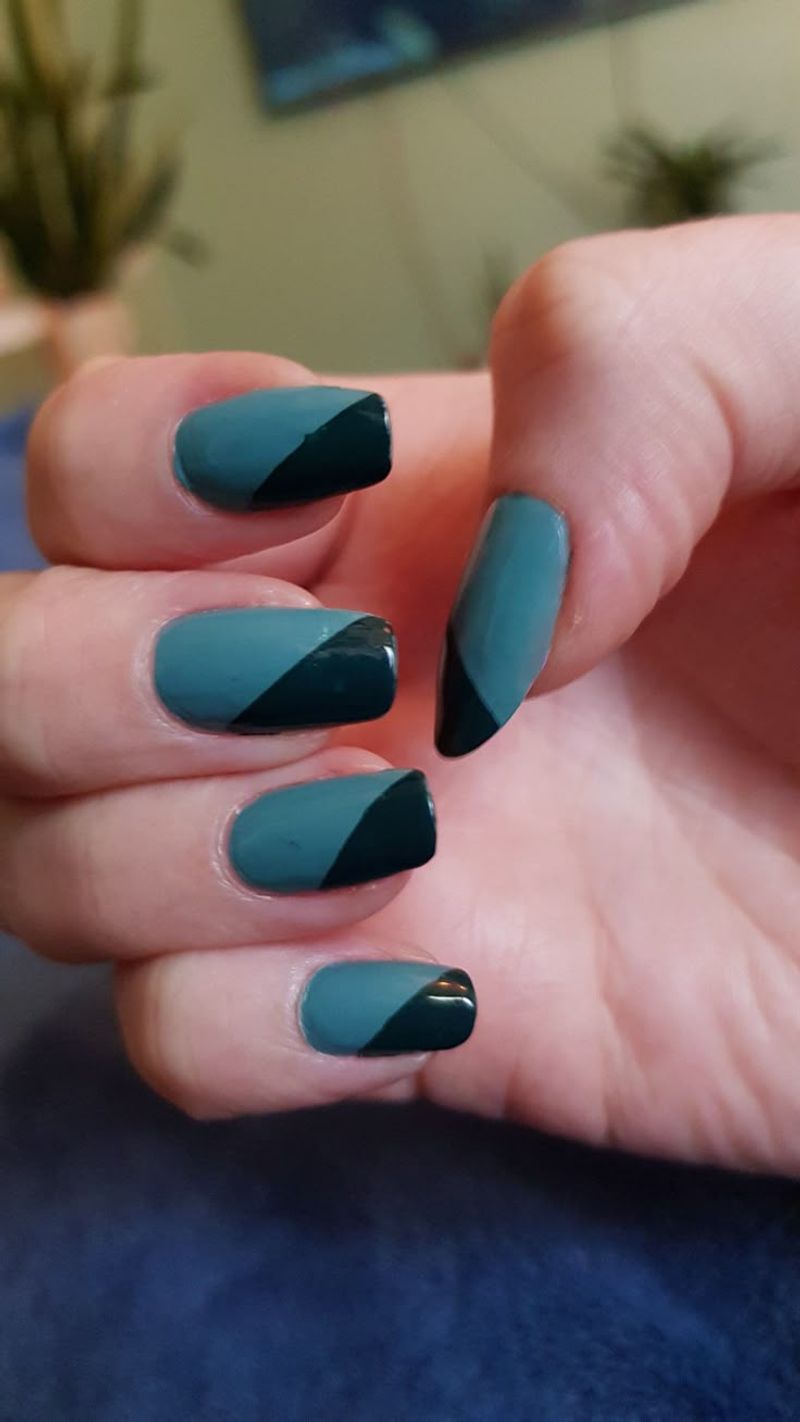
5. Color-Block Corners
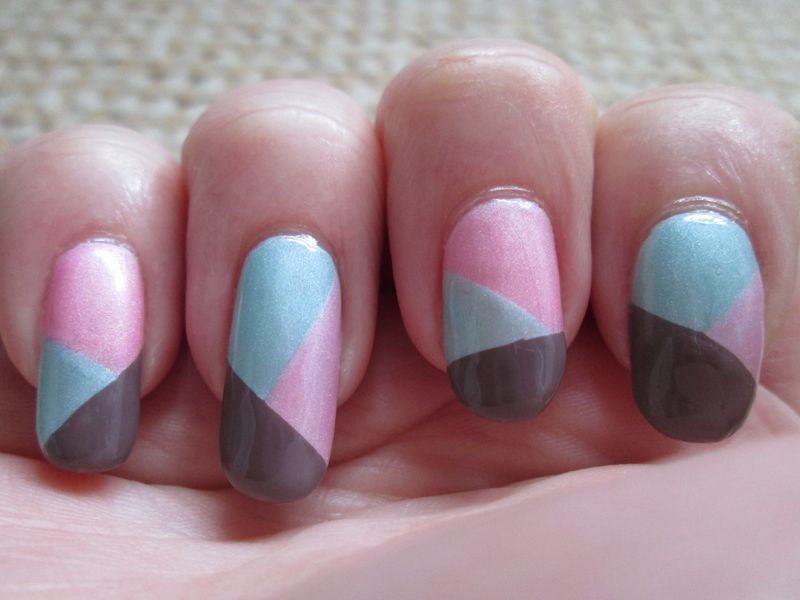
While painting your entire nail requires steadiness, coloring just one corner forgives even the shakiest hands! Apply your base color, let dry, then add a diagonal swipe of contrasting polish across one corner.
Though asymmetrical, this design appears deliberately artistic rather than messy. After sharing this technique on my blog, readers flooded my inbox with their gorgeous variations!
6. Glitter Gradient Fade
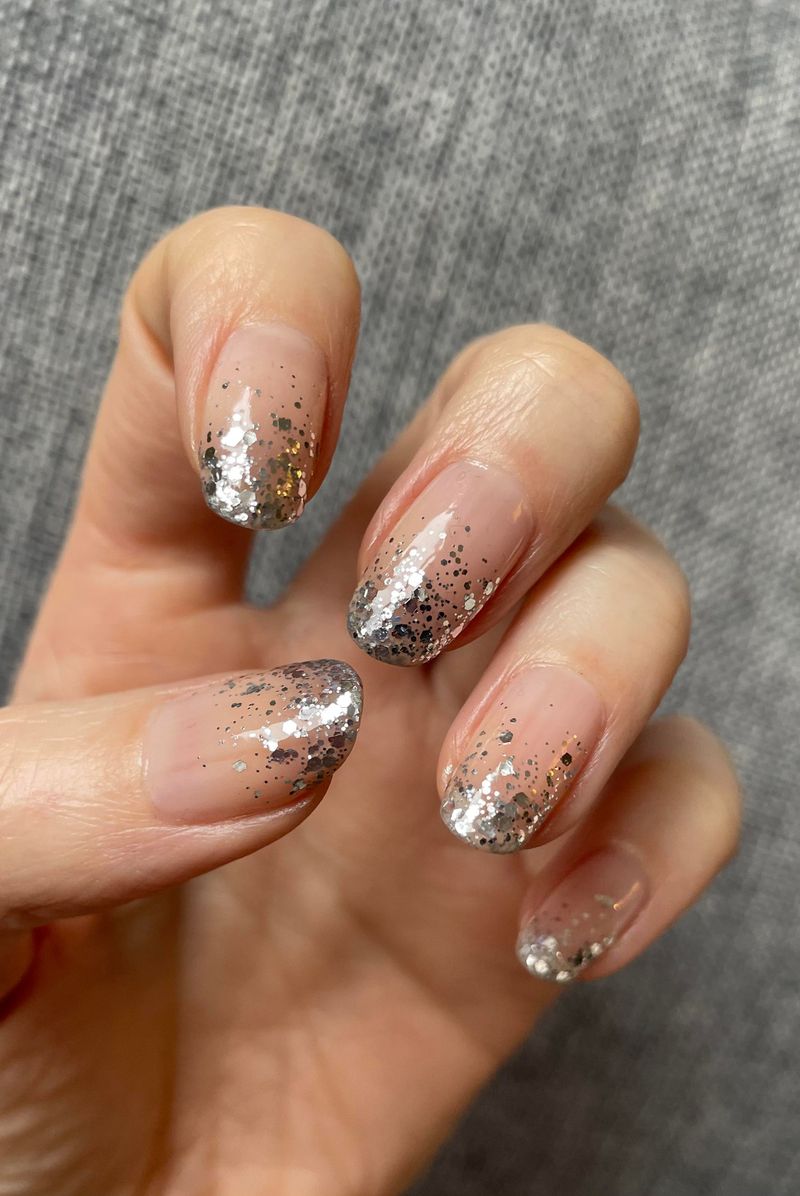
Though intricate nail art intimidates many, glitter gradients require zero precision! Apply your base color, then dab glitter polish near your cuticle, gradually applying less as you move toward the tip.
The random sparkle distribution creates a gorgeous fade effect without any special tools. My most glitter-averse clients have become converts after trying this foolproof technique!
7. Matte Top Coat Magic
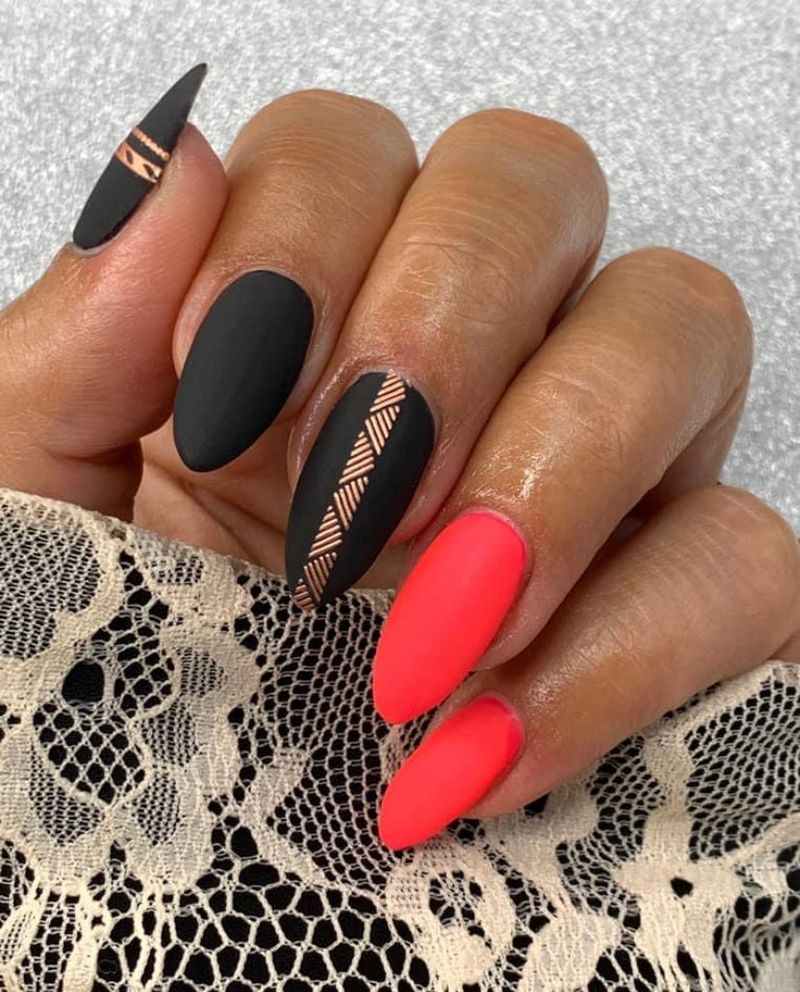
Before discovering matte top coats, I spent hours on complicated designs. Now I simply apply any polish—even chipped ones—and finish with matte top coat for instant sophistication.
The velvety finish transforms even the most basic colors into editorial-worthy manicures. Hence why I always pack a matte top coat when doing celebrity nails backstage at fashion shows!
8. Scotch Tape Geometrics
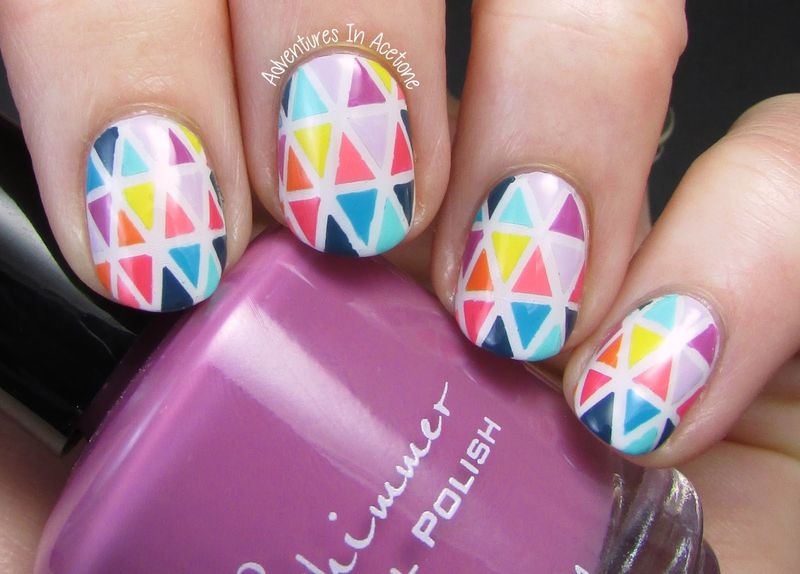
Despite appearing complex, geometric nail designs become child’s play with regular Scotch tape! Apply base color, let dry completely, then place tape strips to create triangles or stripes before applying your second color.
Though precision seems necessary, any imperfections look intentionally artistic. My teenage nieces mastered this technique in minutes—proof that anyone can nail this look!
9. Watercolor Swirls
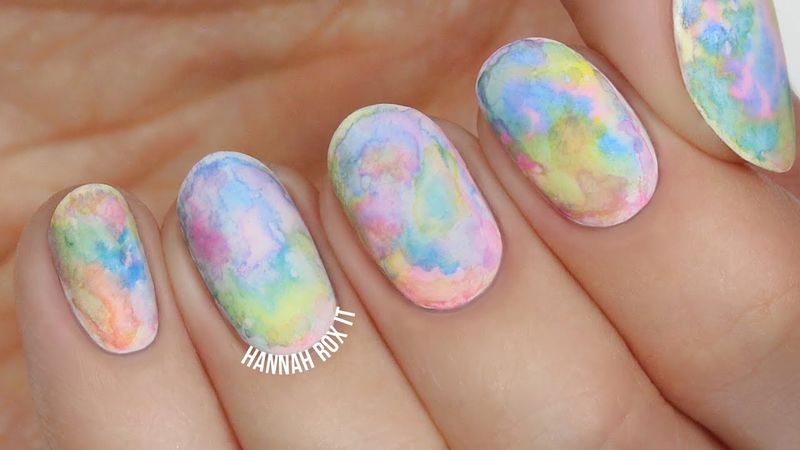
While watercolor paintings require skill, watercolor nails forgive amateur attempts! Apply a white base, then drop tiny dots of diluted polish onto your still-wet nail. Watch colors blend unpredictably.
Though uncontrollable, the random blending creates one-of-a-kind masterpieces. My artistically challenged husband created stunning watercolor nails on his first try—they’re that foolproof!
10. Foil Transfer Accents
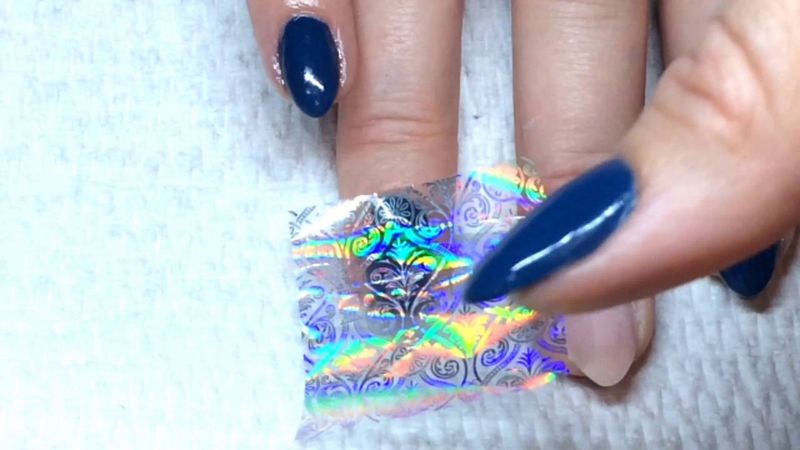
Though nail foils intimidated me initially, they’ve become my favorite shortcut for statement nails! Apply a sticky base coat, press pre-designed foil onto your nail, then peel back to reveal perfect patterns.
The metallic finish appears professionally done regardless of application technique. My busy mom clients swear by this method for special occasions when time runs short!
11. Single Stripe Simplicity
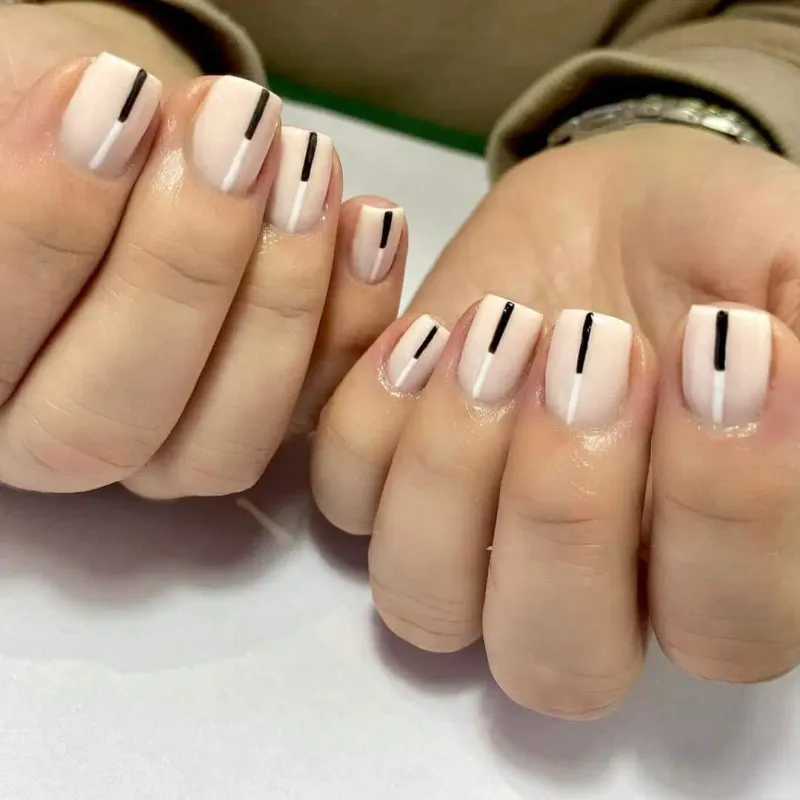
Where complex striping fails, a single bold line succeeds! Paint your nails one color, then once dry, brush a contrasting stripe horizontally, vertically, or diagonally across each nail.
Though minimal, this design appears intentionally architectural rather than lazy. My fashion editor friend receives constant compliments on this look—proof that less truly delivers more!
12. Cuticle Moon Highlight
Despite seeming complex, cuticle moons require minimal skill! Apply your main color as usual, then use a small brush to trace a thin metallic arc just above your cuticle.
Though technically challenging-sounding, even wobbly lines look intentionally artistic. My clients with perpetually shaky hands achieve gorgeous results with this forgiving technique!
13. Newspaper Print Transfer
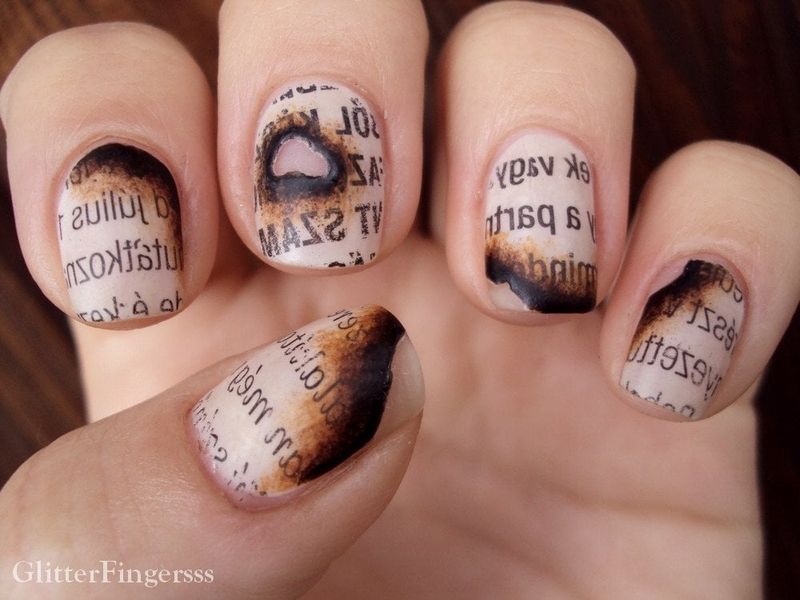
Though seemingly complicated, newspaper nails require zero artistic ability! Paint nails white, dip in alcohol for 5 seconds, then press newspaper against them—text transfers instantly.
The vintage typography effect appears professionally crafted regardless of application technique. My journalist friend rocks this meta manicure to industry events, always generating conversation!
14. Barely-There Neutral
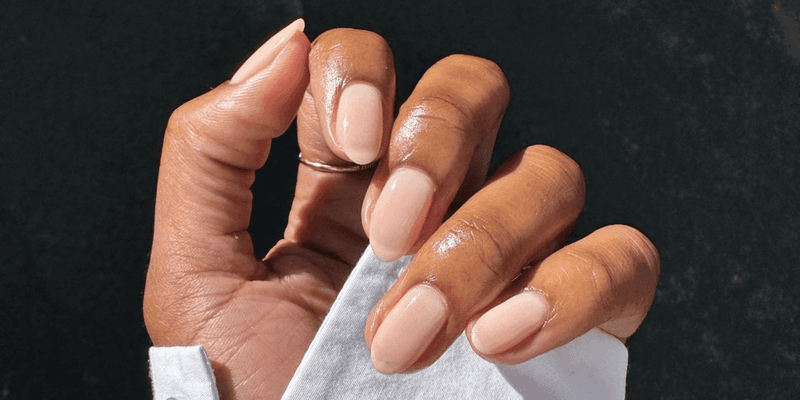
While flashy designs turn heads, perfectly polished neutral nails command respect in boardrooms! Select a shade matching your skin undertone for an elongating effect that forgives application errors.
The neutral finish appears naturally flawless despite minimal effort. Hence why I’ve done neutral manicures for countless executives who need polish that transitions seamlessly from meetings to cocktail events!
15. Polka Dot Border
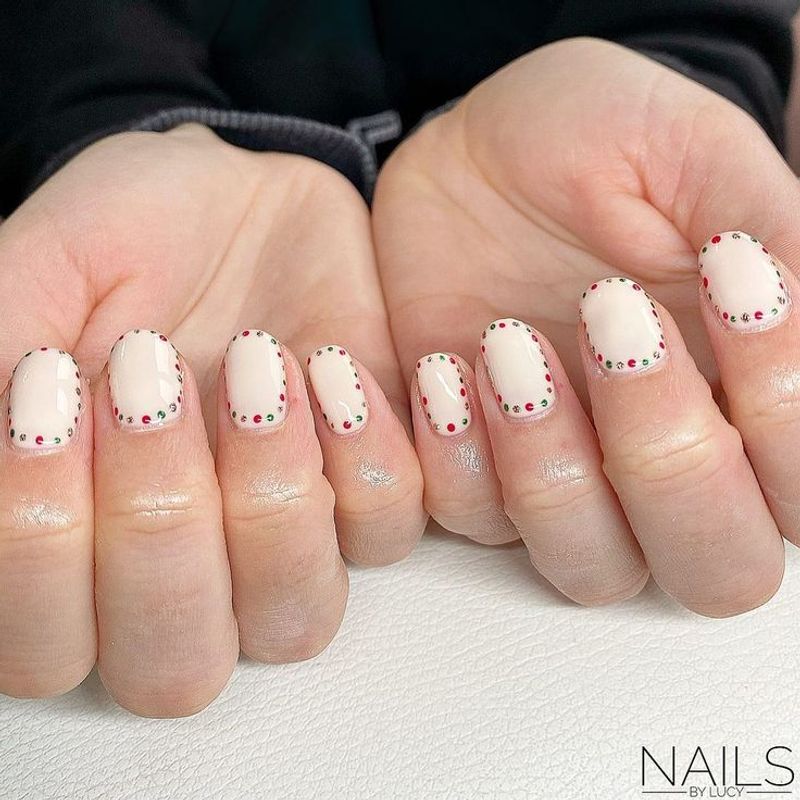
Though seemingly intricate, polka dot borders require minimal precision! Apply your base color, then use a dotting tool (or bobby pin) to create dots along the edge of your nail bed.
The spaced pattern forgives uneven placement, appearing deliberately playful rather than messy. My most coordination-challenged client mastered this look after just one attempt!
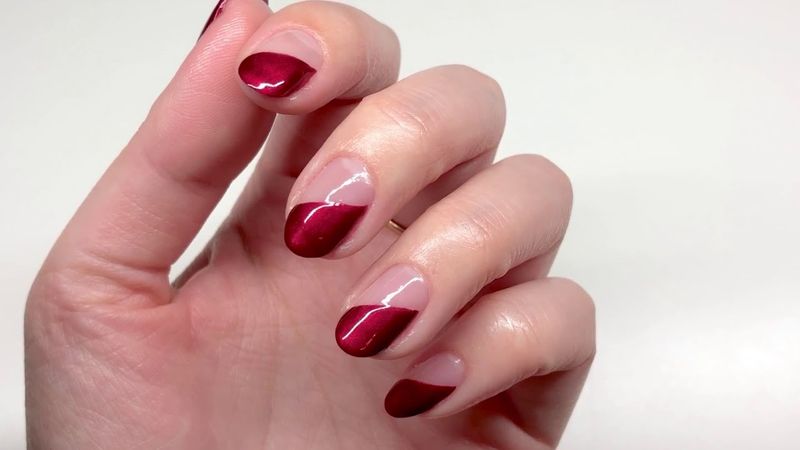
16. Two-Tone Diagonal Split
Despite looking salon-perfect, diagonal splits practically paint themselves! Apply your first color, let dry, then place tape diagonally and paint the exposed half with your second shade.
Though precision seems necessary, slight wobbles add character rather than messiness. My teenage daughter taught herself this technique from my blog—it’s genuinely that straightforward!
17. Confetti Topper

Where elaborate designs fail, confetti toppers triumph! Apply your base color, then add one coat of clear polish containing multicolored glitter pieces for instant festivity.
The random distribution creates perfectly imperfect celebration-ready nails. Though I’ve created complex nail art for celebrities, this simple technique remains my personal go-to for events!
18. Micro Metallic Studs

Though nail embellishments seem professional-only, micro studs transform amateur manicures instantly! Apply polish as usual, then while slightly tacky, place tiny metallic studs using tweezers or a wax pencil.
The 3D elements create luxe dimension regardless of placement precision. My clients adore how these tiny accents elevate their otherwise simple manicures!
19. Clear Base With Floating Elements
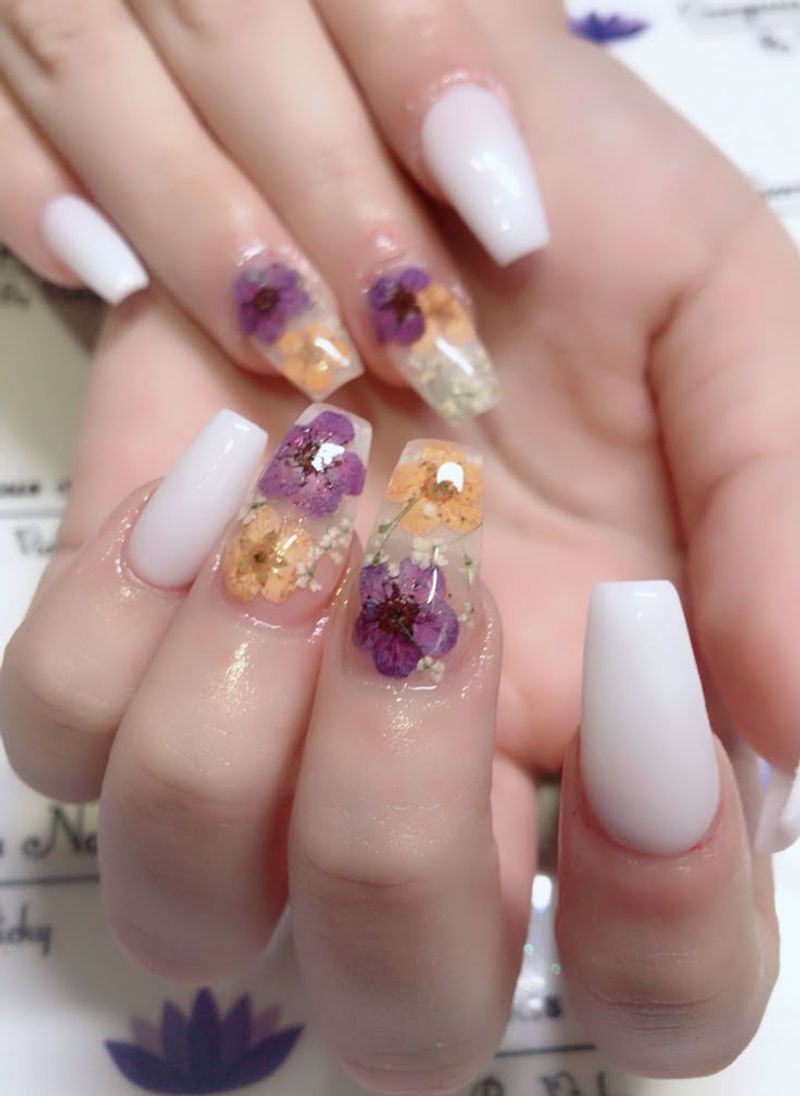
While full-coverage designs require precision, floating elements forgive amateur application! Apply clear polish, then add tiny dried flowers, small confetti, or glitter pieces before sealing with top coat.
The suspended elements create depth regardless of placement. Though I’ve spent years perfecting nail techniques, this beginner-friendly design remains among my most-requested styles!
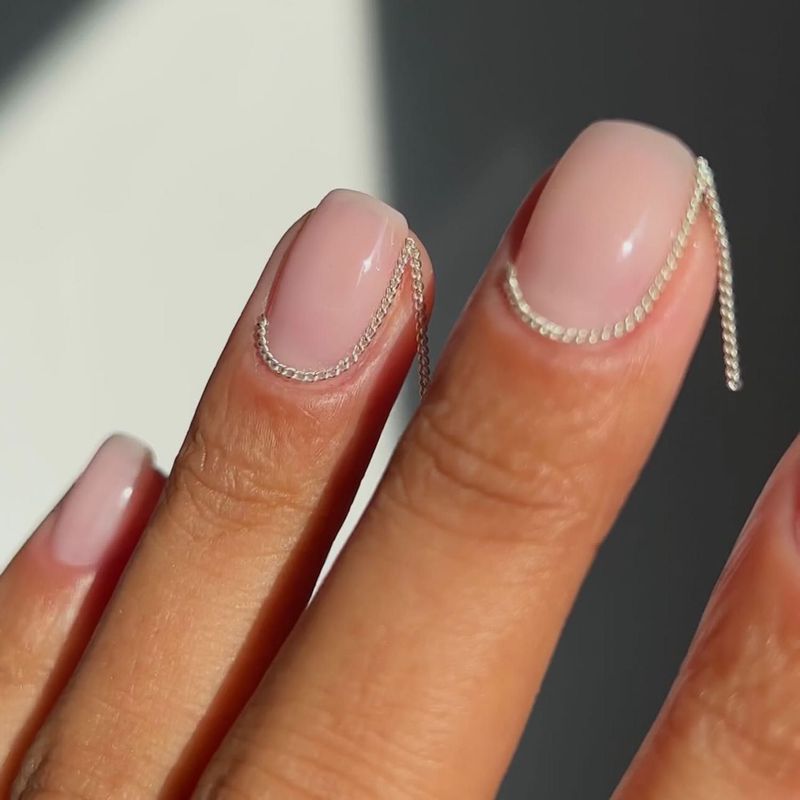
20. Reverse French With Metallic Outline
Though traditional French tips demand steadiness, reverse French designs flip the script! Leave a half-moon space at your nail base, then fill the rest with color and add a thin metallic line at the curve.
The metallic outline elevates even wobbly application. My clients with minimal nail art experience achieve salon-worthy results with this forgiving technique!