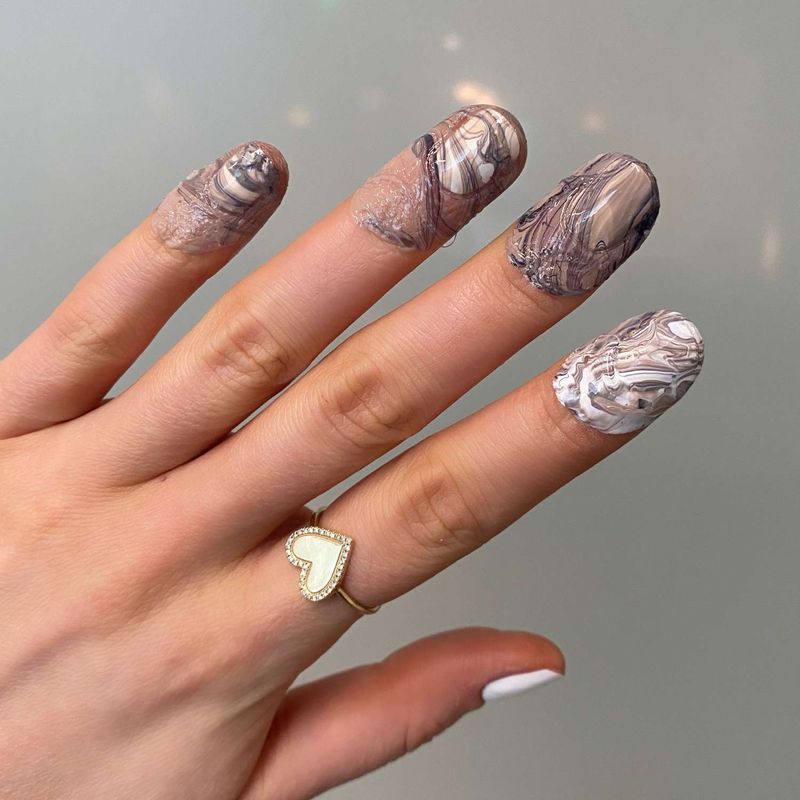
Marble nails have taken the beauty world by storm, and guess what? You don’t need a fancy salon to rock this elegant look! As someone who’s spent years perfecting nail art techniques, I’m thrilled to share these gorgeous marble designs you can create at home with just a few tools.
Ready to transform your plain nails into miniature works of art that’ll have everyone asking for your manicurist’s number?
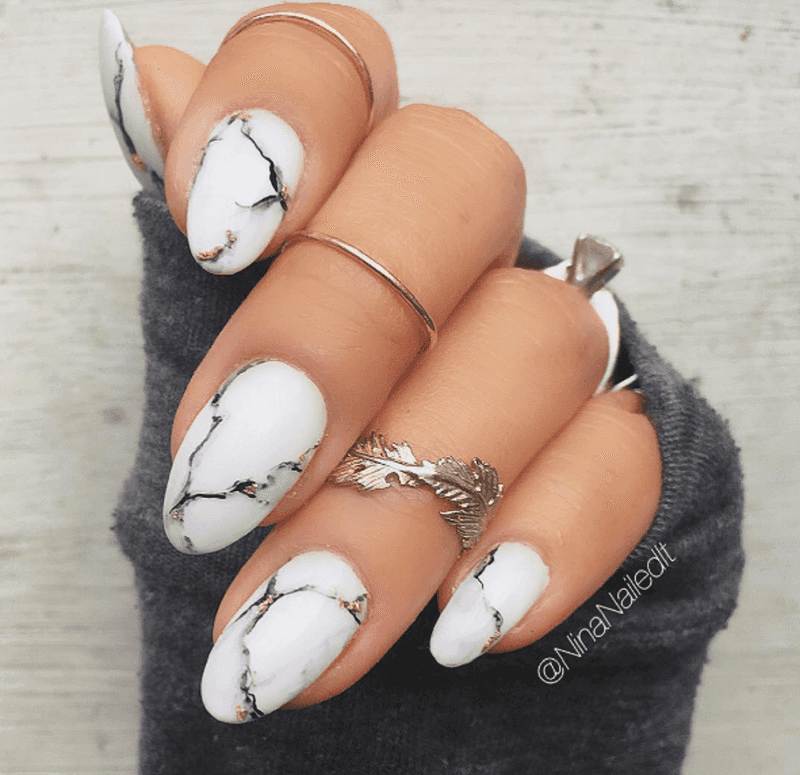
1. Classic White Marble
Nothing beats the timeless elegance of white marble with delicate gray veining! I discovered this look accidentally while experimenting with nail polish remover.
Simply apply a white base, then dip a thin brush in gray polish and drag it across your nail. Quickly blur the lines with a toothpick before it dries for that authentic stone effect.
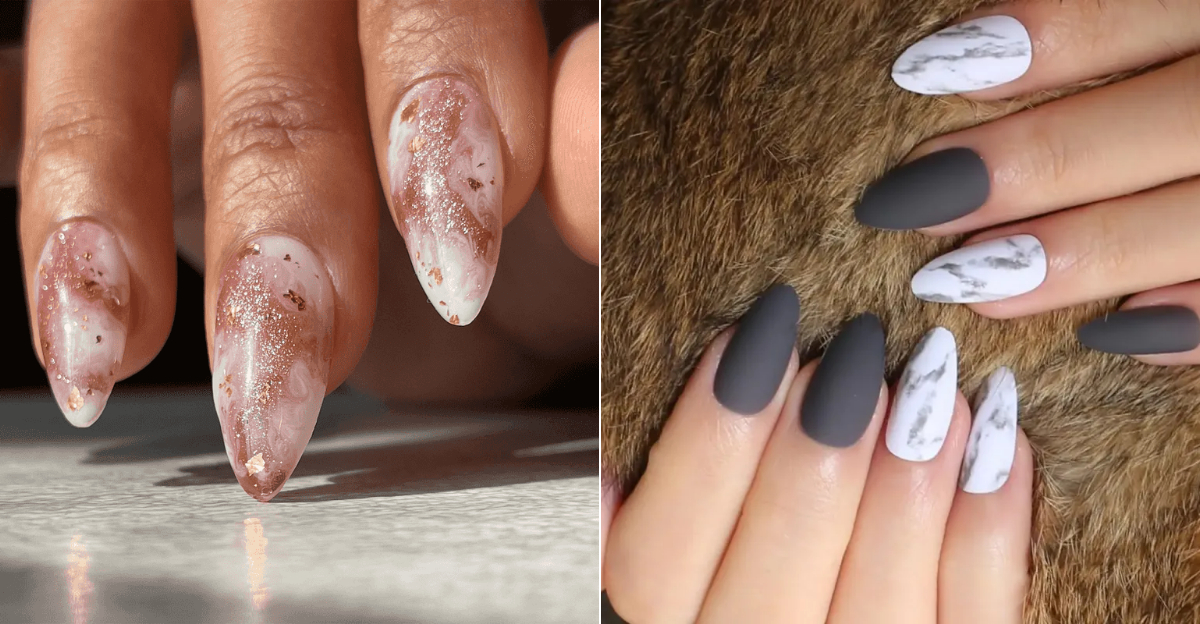
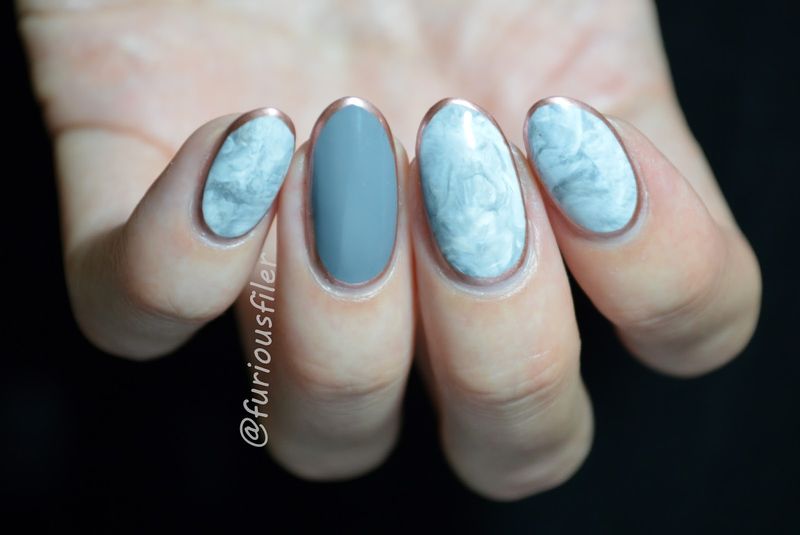
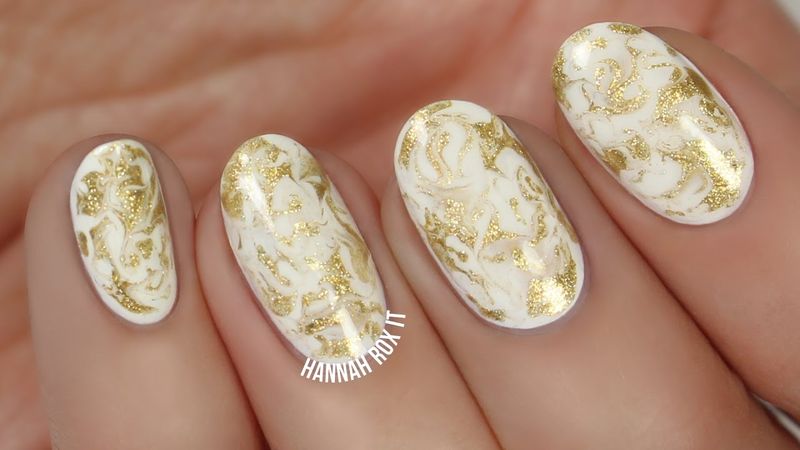
2. Rose Gold Veined Wonder
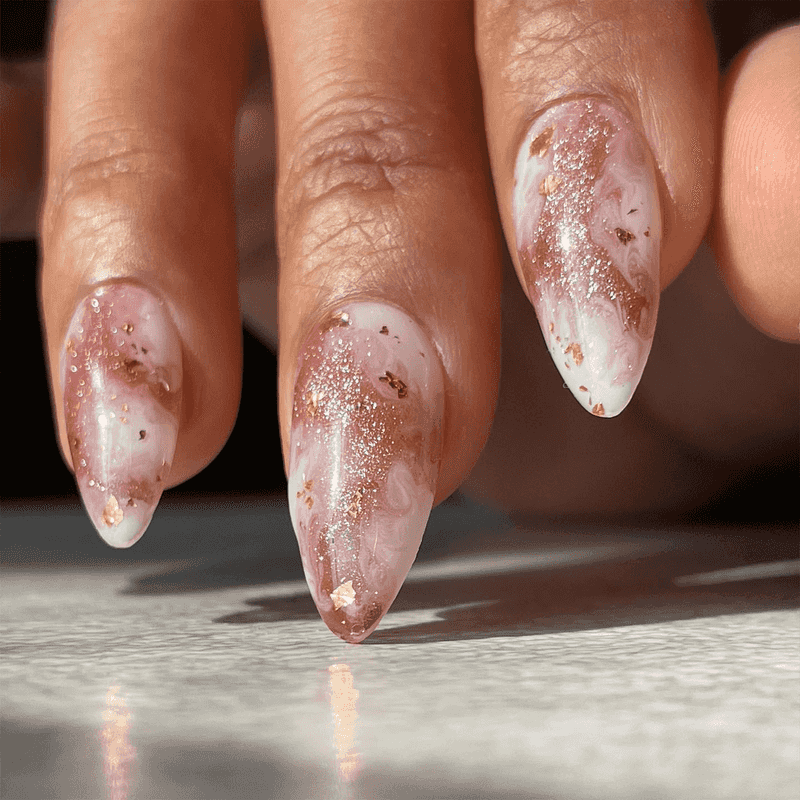
Whenever I create this luxurious design at home, friends assume I’ve spent a fortune at some fancy salon! The rose gold base paired with white marble veining creates such a rich contrast.
After applying your metallic base, use a makeup sponge dipped in white polish to dab gently. Then create those signature veins with a toothpick dipped in gold polish.
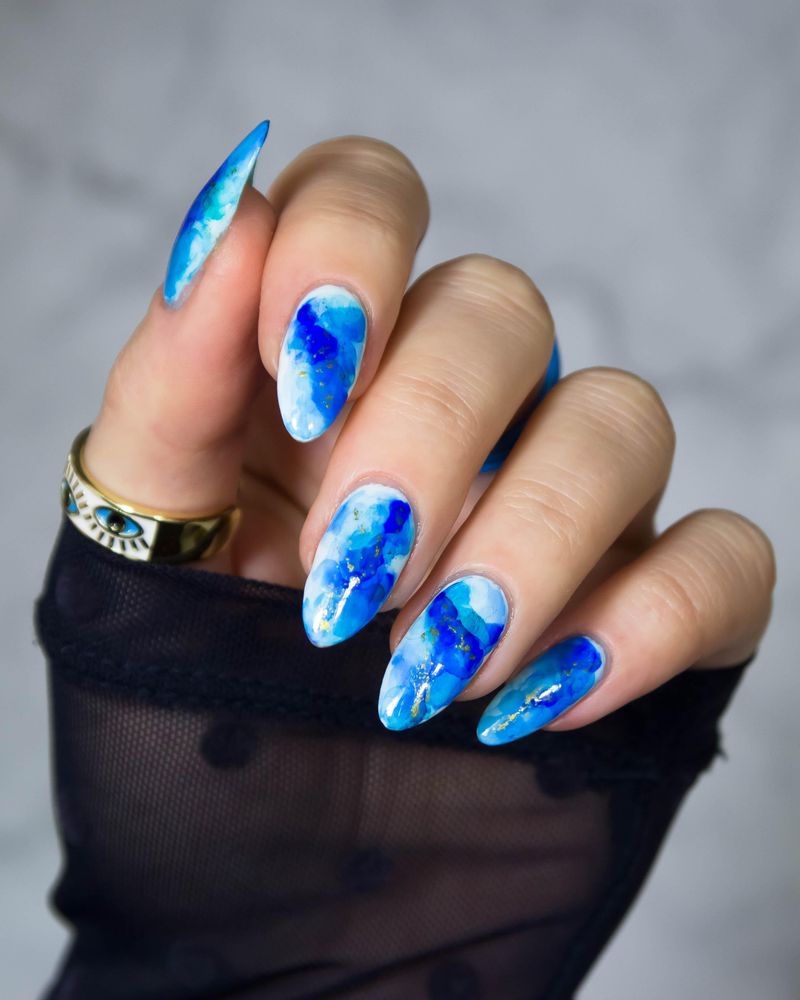
3. Blue Agate Inspired
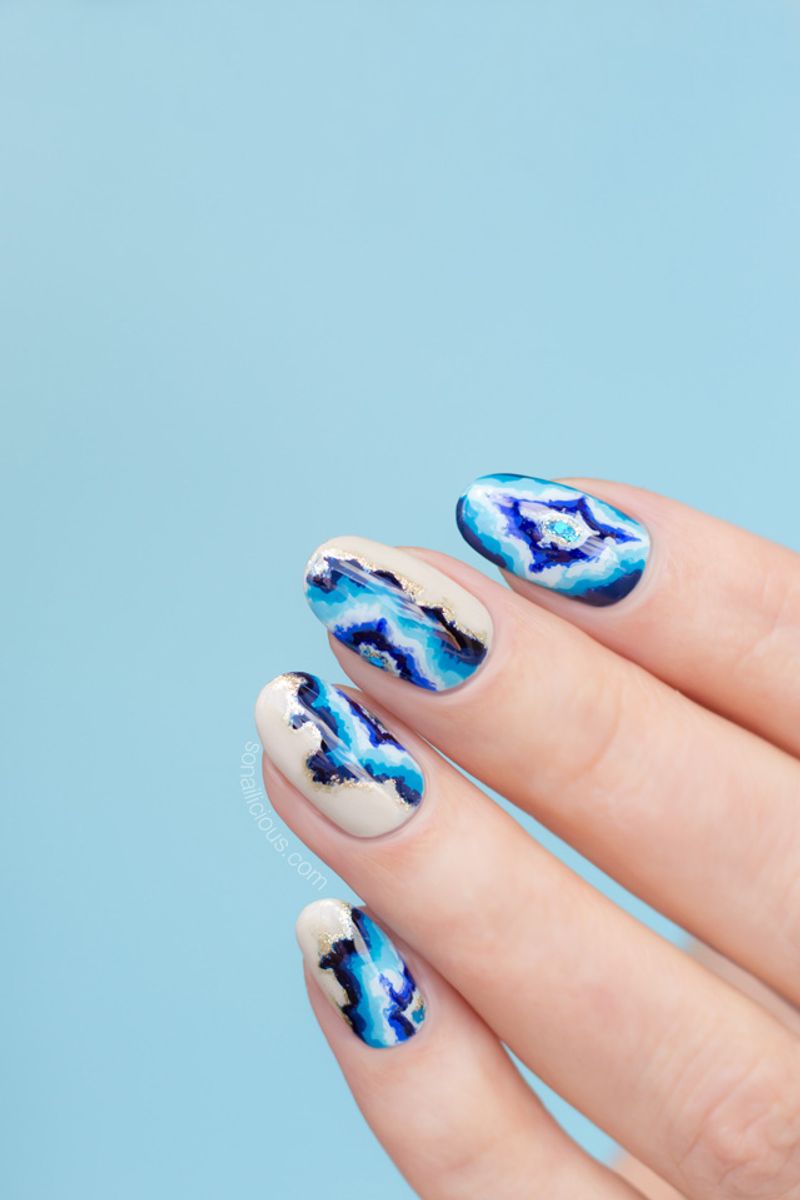
Though technically not marble, this blue agate-inspired design makes my heart skip a beat every time! The swirls of navy, turquoise, and white mimic those gorgeous stone slices perfectly.
Start with a light blue base, then mix darker blues on a plastic bag. Use a thin brush to create circular patterns, dragging inward for that distinctive agate look.
4. Water Marble Technique
If you’ve never tried water marbling, prepare to be amazed (and maybe a little messy the first time)! I still remember my kitchen looking like a crime scene after my first attempt.
Drop different colored polishes into room temperature water, swirl with a toothpick, then dip your finger. The polish adheres to your nail in perfect marble patterns that are truly one-of-a-kind.
5. Black and Gold Luxe
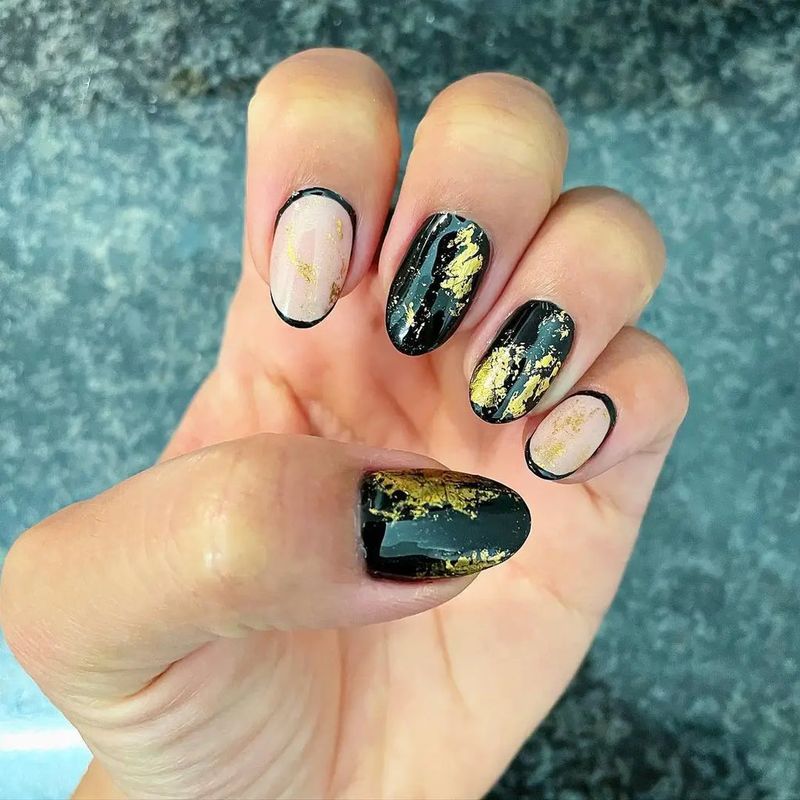
Feeling dramatic? This black marble with gold veining screams luxury without the hefty price tag! My clients go absolutely wild for this combination.
Apply a glossy black base, then use a fine liner brush dipped in gold polish to create thin, random lines. Seal with a top coat that enhances the metallic shine for that jaw-dropping effect everyone will notice.
6. Pastel Rainbow Marble
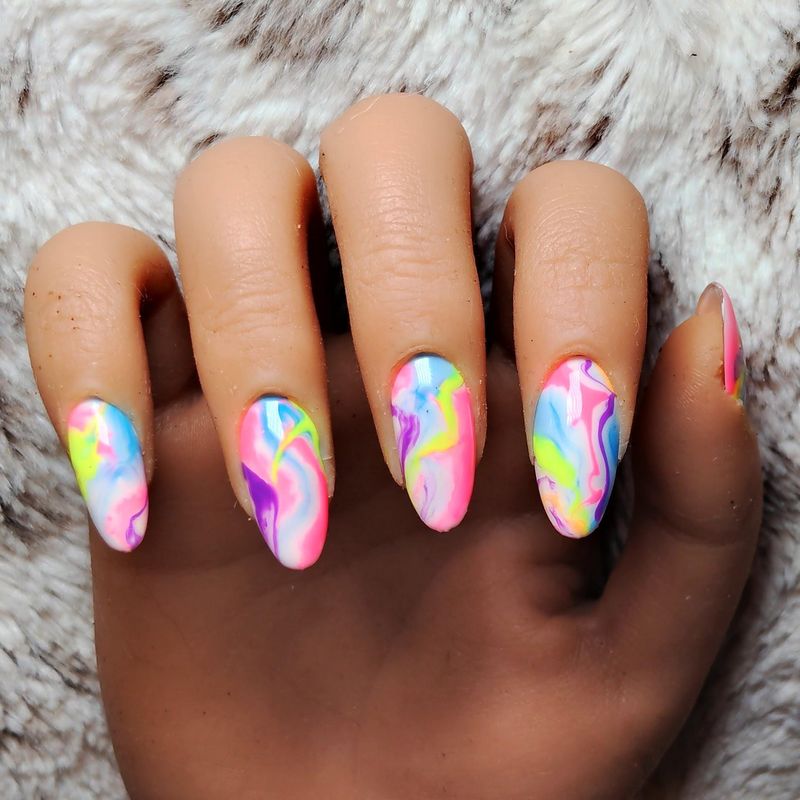
Who says marble has to be monochrome? Not me! This playful take combines soft pastel shades for a unicorn-inspired marble that brightens even the gloomiest Monday.
Layer different pastel polishes on a plastic bag, then use a dotting tool to swirl them together. Press your nail onto the mixture and lift quickly to transfer the marbled design. Magic!
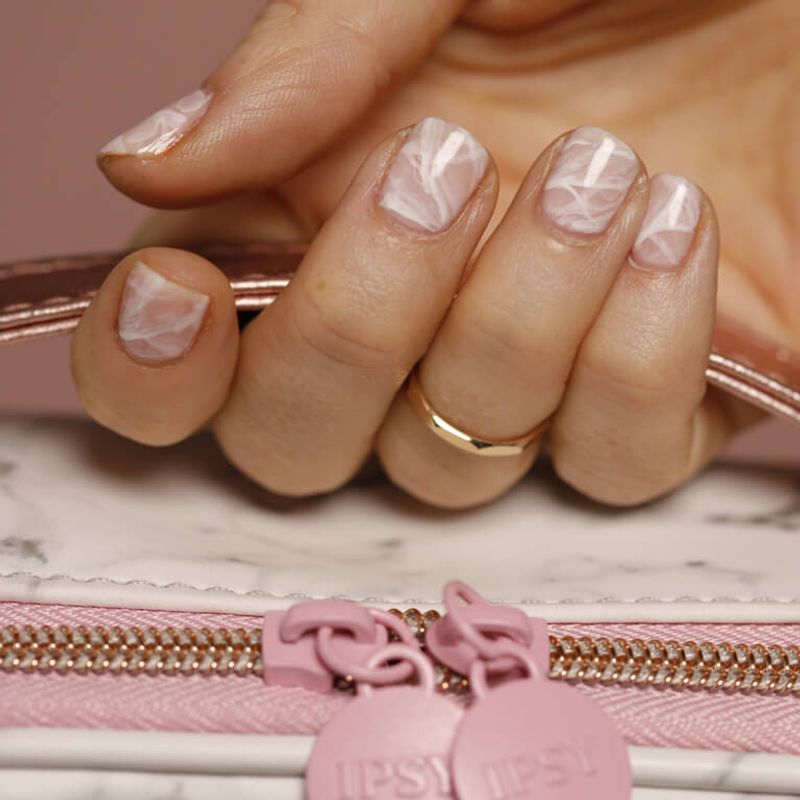
7. Negative Space Marble
Perhaps my favorite minimal-chic design is this see-through marble that lets your natural nail peek through. Sophisticated yet understated, it’s perfect for those who prefer subtle statement pieces.
Apply clear base coat, then create marble patterns using white and gray polish on just portions of your nail. The contrast between bare nail and marble creates a modern, airy effect that works for any occasion.
8. Matte Finish Marble
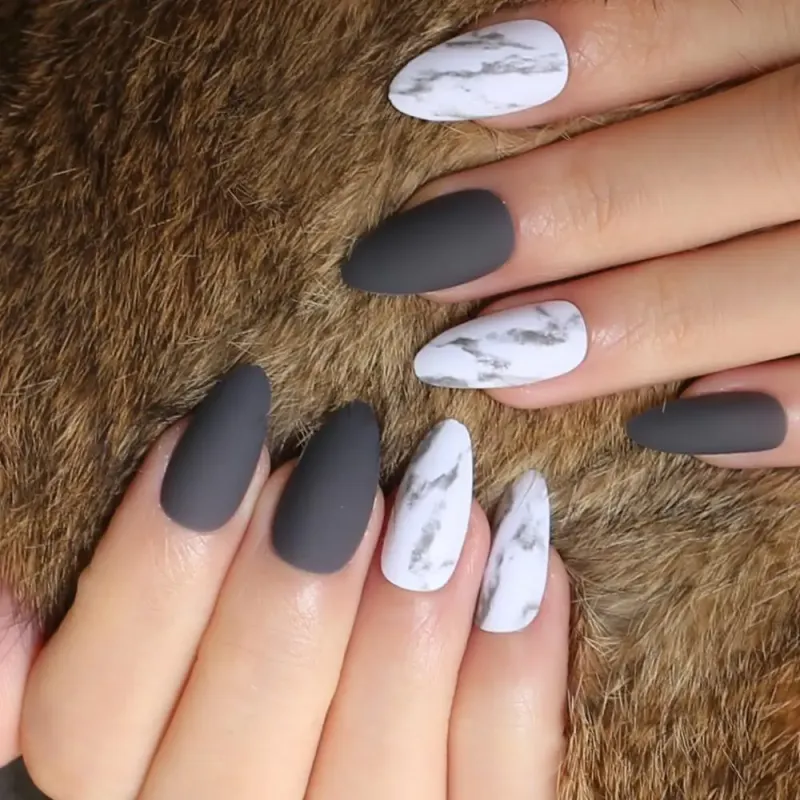
Honestly, adding a matte top coat to any marble design instantly elevates it to gallery-worthy status! The soft, velvety finish gives dimension to the veining in ways that surprise even me after years of nail artistry.
Create your marble design as usual, but finish with a matte top coat instead of glossy. The transformation is subtle yet remarkable—like comparing regular paper to expensive cardstock.
9. Foil-Assisted Marble
Running short on time? Grab some nail foil for the quickest marble hack ever! I discovered this technique when rushing to fix my nails before a wedding.
Apply a base color, then press crumpled transfer foil onto semi-dry polish. The foil creates random patterns that perfectly mimic marble veining without the precision work. A true five-minute miracle for nail emergencies!
10. Green Malachite Inspired
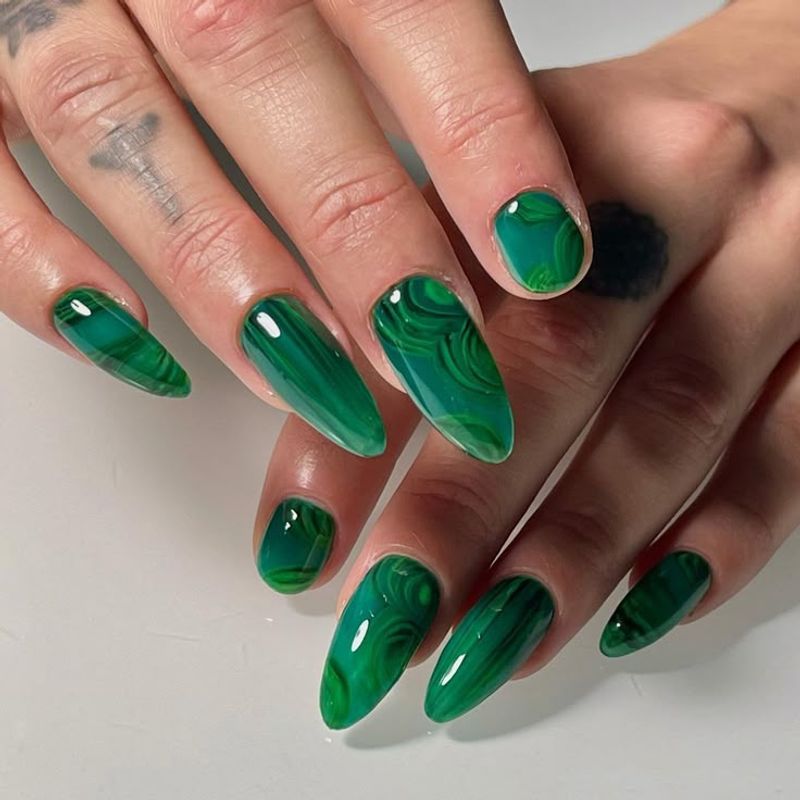
While admiring a malachite jewelry piece, I wondered if I could recreate those hypnotic green bands on my nails—turns out, it’s surprisingly doable!
Layer different shades of green polish on plastic wrap, then press onto your nail. Use a thin brush to add darker green curved lines that mimic malachite’s distinctive banding. The result is a gemstone effect that looks impossibly intricate.
11. Alcohol Ink Marble
After accidentally spilling rubbing alcohol on my freshly painted nails, I stumbled upon this game-changing technique! The resulting patterns were more realistic than any marble I’d created before.
Apply a light base color, drop different colored polishes onto your nail, then immediately add a drop of alcohol. Watch in amazement as the colors spread and create natural-looking veins that dry within minutes.
12. Tortoiseshell Marble
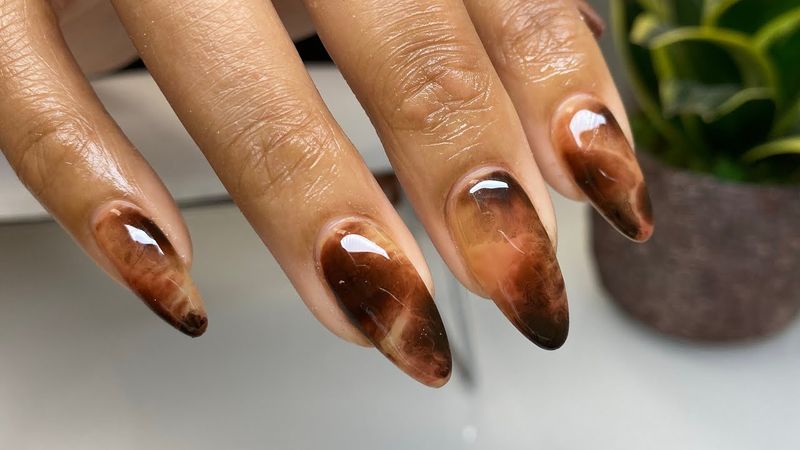
Though technically not stone, tortoiseshell has that gorgeous marbled quality that translates beautifully to nails. I wear this amber-toned design whenever I want something different yet classic.
Start with a yellowish-brown base, then add random splotches of black and dark brown. Use a thin brush to blur the edges slightly, creating that distinctive tortoiseshell pattern that looks incredible with gold jewelry.
13. Galaxy Marble
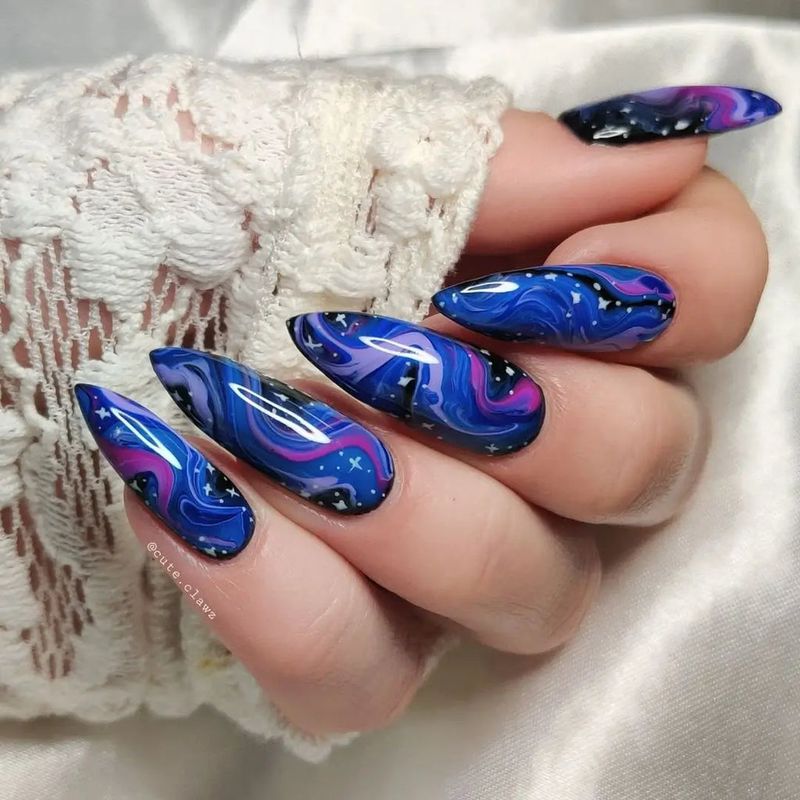
Whenever I sport this cosmic design, strangers literally stop me to ask about my nails! The swirling blues, purples, and whites create an otherworldly marble effect reminiscent of distant nebulae.
Layer dark blue or black polish with sponged-on purple and blue. Add white dots for stars, then swirl slightly with a toothpick. The final effect is less structured than traditional marble but equally mesmerizing.
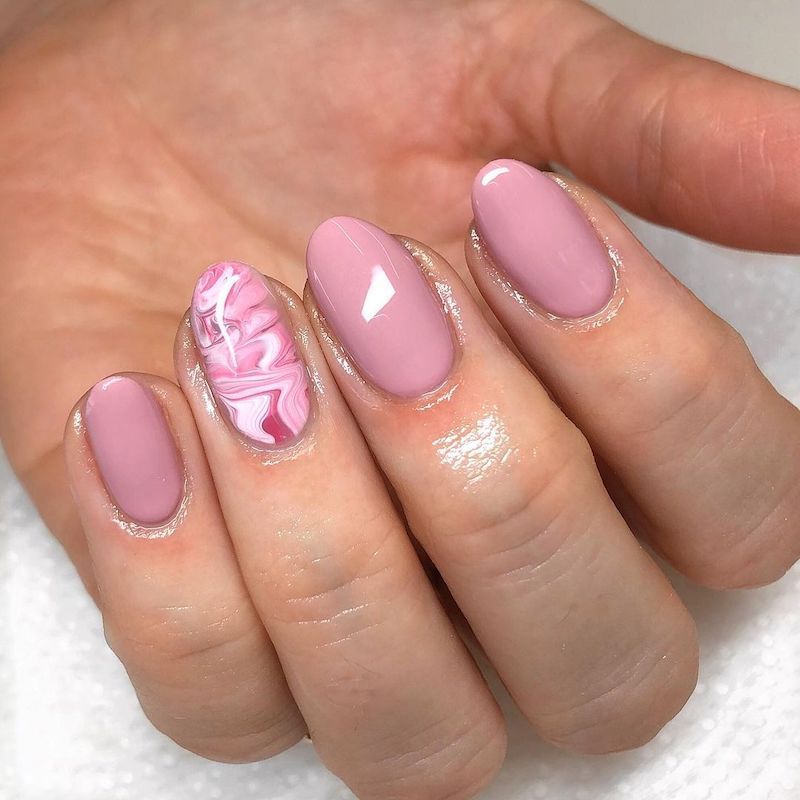
14. Pink Quartz Effect
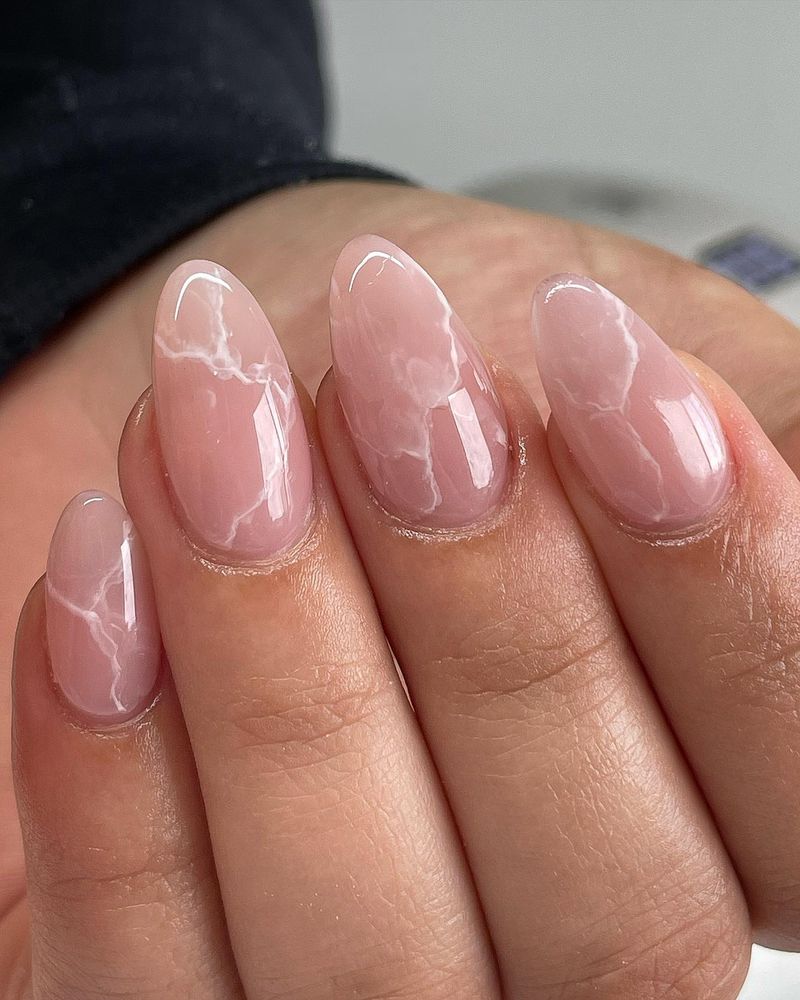
If gentle, romantic vibes are your thing, this rose quartz-inspired design captures that delicate crystal energy perfectly! I created this for a bride who wanted something special yet subtle.
Mix white polish with the tiniest drop of pink, then add slightly darker pink veining. The secret is keeping the lines very thin and feathery—think whispers rather than bold statements for that authentic crystal appearance.
15. Sharpie Pen Marble
No special tools? No problem! Grab a Sharpie marker from your desk drawer for this jaw-dropping hack that saved me during a vacation nail emergency.
Apply white polish, then draw random lines with a Sharpie marker. Quickly dab rubbing alcohol over the design with a cotton swab, which dissolves the ink into perfect marble patterns. Just be sure to seal with a good top coat!
16. Turquoise Stone Marble
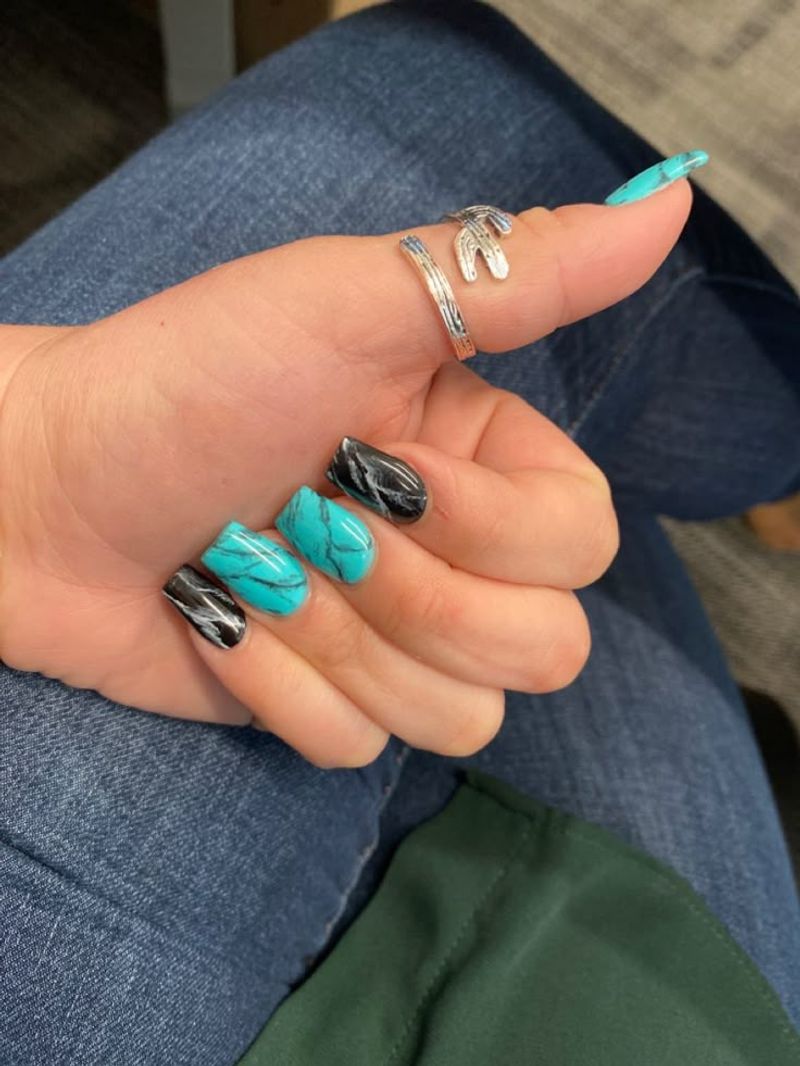
Having grown up in the Southwest, I’ve always been mesmerized by turquoise jewelry. This nail version captures that earthy, speckled stone quality that pairs beautifully with both silver and gold accessories.
Start with a turquoise base, then use a toothbrush to splatter tiny black dots. Add a few gold veins with a thin brush for that authentic turquoise look that’s both bohemian and sophisticated.
17. Marble French Tips
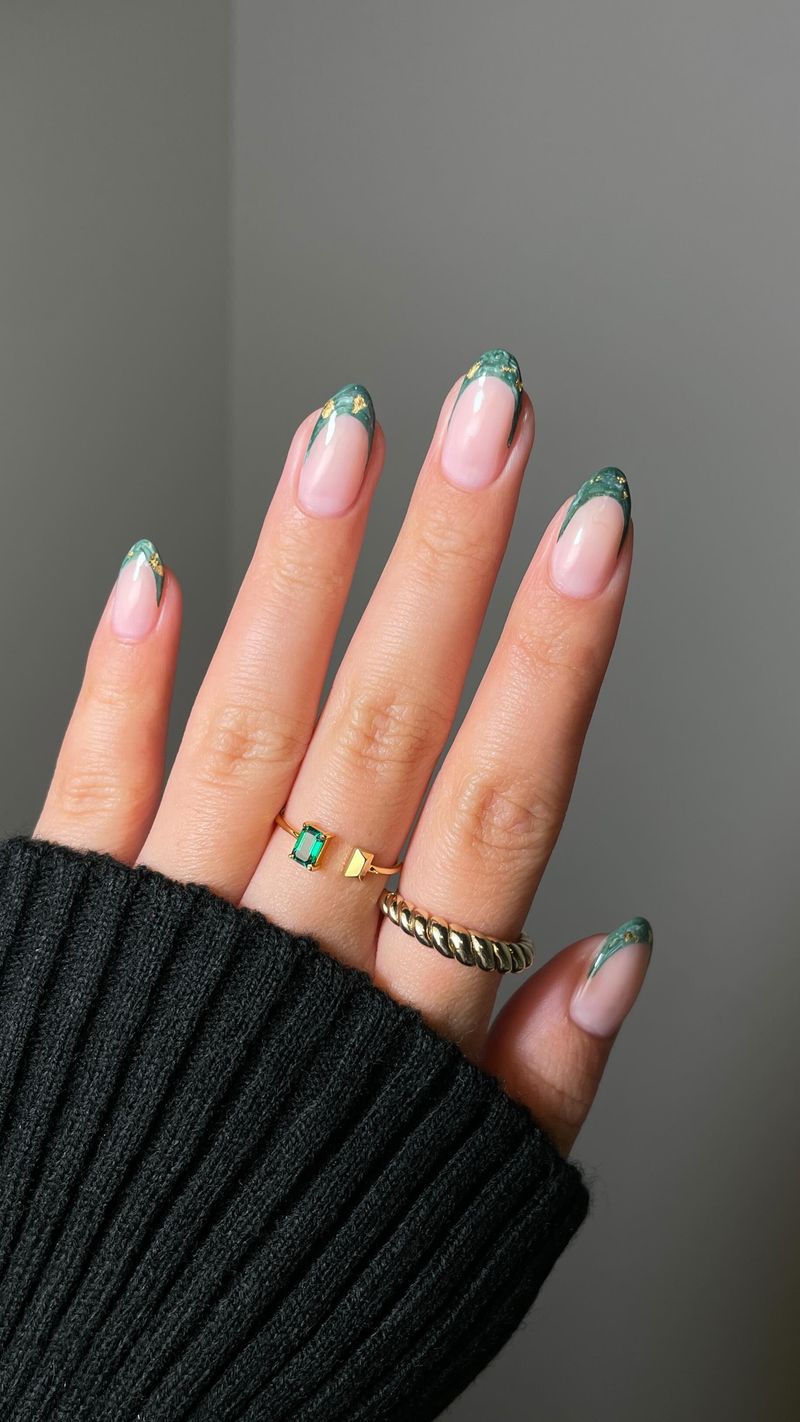
Why marble your entire nail when the tips alone create such a sophisticated statement? This minimalist approach has become my go-to for professional settings where I want to look polished yet creative.
Apply a nude base, then use a small makeup sponge to dab white polish just on the tips. Add marble veining with a thin brush dipped in gray, focusing only on those french tips for an elegant twist on a classic.
18. Holographic Marble
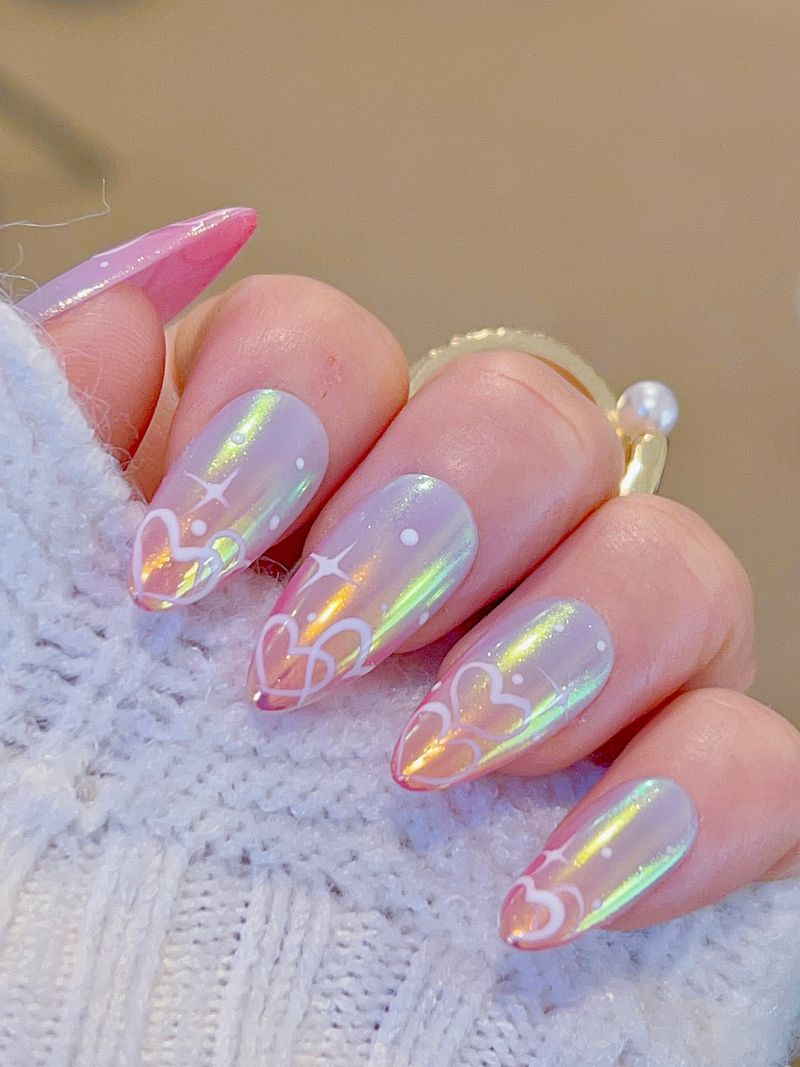
Whenever I’m feeling extra, this futuristic take on marble never disappoints! The combination of traditional veining with rainbow-shifting holographic effects creates dimension that seems almost 3D.
Apply holographic polish as your base, then create marble veining with white polish. The holographic shimmer shows through the veining, creating a magical effect as your nails catch the light from different angles.
19. Marble Accent Nail
Sometimes less is more! When I’m pressed for time but still want that wow factor, I’ll marble just one accent nail on each hand while keeping the rest simple.
Choose a solid color for most nails that complements your marble design. Then go all out on your ring fingers with detailed marble work. This focal point approach actually makes the marble design stand out more dramatically.